In the quest for home and property security, LED motion sensor lights stand out as an example of innovation and efficiency. However, the challenge of ensuring their optimal performance during the bright daylight hours often goes overlooked. Testing your LED motion sensor light when the sun is up helps confirm that settings, photocell behavior, and detection range work as expected, providing peace of mind that your space is well-lit and secure at all times.
The problem with testing in daylight is not the sensor — it is the photocell. Every decent outdoor motion fixture has a photocell that locks the lamp off when ambient light exceeds a threshold (typically 10-30 LUX). In daylight, ambient light is in the 10,000-100,000 LUX range, so the photocell keeps the lamp off even when the motion sensor detects a person walking two feet away. The fixture is not broken; it is working correctly. You just need to bypass the photocell long enough to confirm the motion detection, sensitivity, and timing are all dialed in before you walk away.
Understanding LED Motion Sensor Lights
The pairing of LED technology with motion sensing capabilities has transformed how we light up our spaces. LED lights are renowned for their energy efficiency, long lifespan, and bright, clear illumination. When combined with motion sensors, these lights offer a responsive lighting solution that only activates when movement is detected, further enhancing their energy efficiency and utility. This synergy not only saves power but also adds a layer of security by illuminating areas when someone approaches, making
LED motion sensor lights a popular choice for exterior lighting, including LED motion sensor flood lights.
Two sensing technologies dominate the market.
PIR (passive infrared) sensors detect the heat signature of a moving human or animal against a cooler background — they are the standard for outdoor residential fixtures.
Microwave (active radar) sensors emit a low-power radio signal and detect phase shifts in the reflected wave when something moves. Microwave sensors see through non-metallic barriers (plastic covers, thin drywall) and read motion in three dimensions, but they draw more power and are prone to false-triggering on HVAC airflow, fans, and nearby traffic. Our deep-dive on
microwave vs PIR motion sensors covers the trade-offs in detail.
Why Daylight Testing Matters
Testing LED motion sensor lights during the day ensures they perform effectively under all lighting conditions, especially when natural light could potentially interfere with sensor functionality. Daylight testing helps identify and adjust for factors that might cause the sensor to underperform, such as direct sunlight or reflections that could trigger false alarms or prevent the light from activating when needed. This check helps confirm that your LED motion sensor lights respond as expected, providing reliable lighting and security regardless of the time of day.
The cost of skipping daylight testing is usually discovered at the worst possible moment — the first night a delivery driver rings the doorbell, or the first storm that knocks pine cones off the roof. A 10-minute calibration in daylight catches the three most common install mistakes (aiming the PIR down the path instead of across it, mounting under a sun-baked eave that heats the sensor housing, and leaving the photocell set to a threshold that bypasses dusk). All three are invisible at night and trivially fixed with a screwdriver and a ladder in the afternoon.
Step-by-Step Guide: Testing LED Motion Sensor Lights During the Day
1. Manual Override Check
The manual override feature in most LED motion sensor lights is a crucial functionality that allows users to temporarily disable the motion detection feature, keeping the light on continuously. This is particularly useful for occasions requiring constant lighting or for testing the light's operation during daylight. To activate the manual override, the general method involves quickly switching the light off and then on, typically within a few seconds, although the exact process can vary between different models. It's important to consult the specific light's manual for detailed instructions, as manufacturers may use various methods such as dedicated switches, dials, or specific power switch sequences to engage this feature.
Using the manual override not only aids in situations requiring extended lighting without motion detection but also serves as a diagnostic tool to verify the light fixture and its components are functioning correctly. If the light does not remain on in manual mode, this could indicate
issues beyond the sensor, such as with the power supply or internal wiring. The override is your baseline test: if the lamp does not light under override, the motion sensor is irrelevant — fix the power first.
2. Sensitivity Adjustment
Fine-tuning the sensitivity of your LED motion sensor light is a pivotal step in ensuring it performs optimally during the day. The right sensitivity setting helps in striking a perfect balance; too high, and the light may activate with every passing shadow or small animal, leading to unnecessary energy consumption and potential security false alarms. Conversely, too low a sensitivity setting risks the light not activating when it's most needed, thereby compromising the safety and
security of your premises.
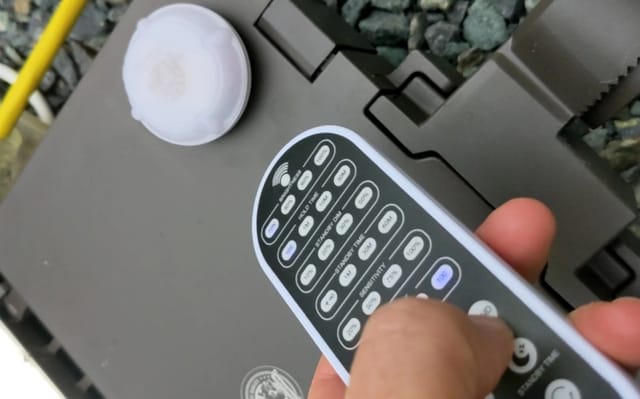
Most LED motion sensor lights come equipped with a sensitivity control mechanism, typically in the form of a dial or a switch located on the sensor unit itself. Adjusting this control allows you to incrementally increase or decrease the sensor's responsiveness to motion, enabling you to customize the detection range according to your specific needs and the environmental conditions of the installation site.
Experimentation is key when adjusting sensitivity; start by setting the sensitivity to a medium level and then test by moving in the sensor's detection area at different distances and speeds. This practical approach helps identify the sensor's current detection threshold and guides you in fine-tuning it to your desired level of sensitivity. It's also beneficial to consider the environmental factors that could influence sensor performance, such as the position of the sun, nearby trees, or reflective surfaces that might affect how the sensor perceives motion.
3. Cover and Uncover the Sensor
Testing your LED motion sensor light's responsiveness to darkness during daylight hours can be easily accomplished by temporarily simulating nighttime conditions. By covering the sensor with an opaque material, such as a thick cloth or a piece of electrical tape, you effectively mimic the absence of light, tricking the sensor into thinking it's night. This method is straightforward yet highly effective, as it allows you to verify the light's ability to activate in response to perceived darkness.
After covering the sensor, wait a few moments to give the sensor time to adjust to the change in light conditions, then remove the cover. If the sensor is functioning as intended, this sudden shift back to daylight should prompt the light to turn off, demonstrating its capacity to detect and react to changes in ambient light levels. Note — you are covering the photocell (the small round lens usually near the top of the head), not the PIR lens itself. Covering the PIR pyroelectric window blocks motion detection entirely; covering the photocell fools the photocell into reporting darkness while the PIR keeps working.
4. Utilizing Test Modes
Many modern LED motion sensor lights feature a built-in test mode, a valuable tool designed to facilitate effective daylight testing. This specialized mode adjusts the sensor's sensitivity threshold, enabling it to detect motion under bright conditions where it would typically not trigger. By temporarily making the sensor more responsive, test mode allows homeowners to verify the functionality and coverage area of their lighting system without waiting for nighttime.
To engage this mode, refer to your specific light's user manual for the correct procedure, which may involve pressing a button, flipping a switch, or performing a specific sequence of actions. Once activated, test the sensor by walking through its detection range at various angles and speeds, ensuring comprehensive coverage and responsiveness.
Utilizing the test mode not only confirms that your LED motion sensor light operates correctly in all lighting conditions but also helps you familiarize yourself with its capabilities and limitations. This understanding is crucial for optimizing the placement and settings of your
light for maximum efficiency and security coverage. Testing in this mode can reveal areas where the sensor's reach may be inadequate or too sensitive, allowing for adjustments to be made before relying on the system for nighttime security.
When the Sensor Is Not the Problem
If the light will not turn on in test mode, confirm power at the breaker, switch, photocell, and fixture before replacing the sensor. If the fixture works in manual override but not in auto mode, the issue is usually sensitivity, daylight threshold, sensor aim, or a failed sensor module. If neither mode works, treat it as a power, wiring, or fixture problem.
How to Optimize LED Motion Sensor Lights for Daytime Effectiveness
Strategic Placement
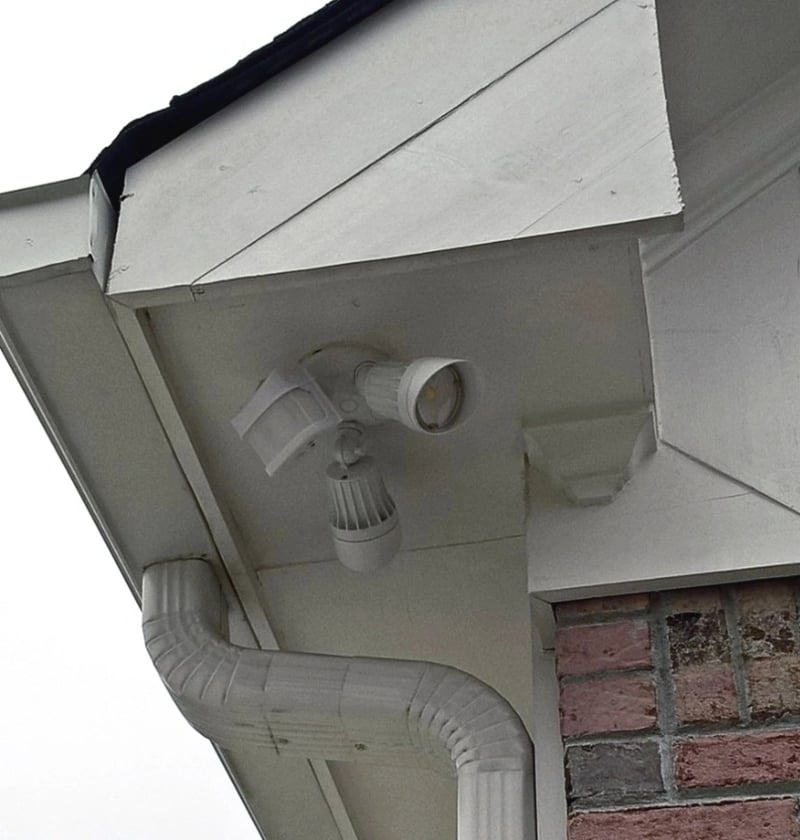
The location of your LED motion sensor light significantly impacts its effectiveness. Place lights away from direct sunlight, which can interfere with the sensors, and position them to cover the areas most likely to need illumination when triggered. Consider height and angle for maximum coverage without directly exposing the sensor to sunlight, which might hinder its detection capabilities. The PIR window should look across the path of travel — a person walking parallel to a sensor crosses multiple pyroelectric zones and triggers reliably, while a person walking straight at a sensor may cover only one zone and slip through. Mounting height of 6-10 feet is the practical sweet spot for a residential entrance; higher than 12 feet and the effective ground coverage shrinks.
Selecting Advanced LED Technologies
Advancements in
LED technology continue to enhance motion sensor light functionality, especially during the day. Look for lights with advanced sensors that can differentiate between natural light variations and actual movement. Adaptive lighting controls that adjust brightness based on ambient light conditions can also improve efficiency and effectiveness, ensuring your lights provide the right level of illumination when triggered, without being overly sensitive to daylight.
Dual-sensor fixtures — PIR plus microwave, or PIR plus ambient-light — add a layer of logical AND to the trigger decision (both sensors must agree), which cuts false triggers dramatically. For
outdoor motion sensor lights in exposed areas with wind-moved trees, the dual-sensor approach is worth the $10-20 premium.
Conclusion
Testing and optimizing your LED motion sensor lights for daylight conditions is essential for ensuring they provide the security and illumination you rely on, day or night. By following the steps outlined above, from manual overrides and sensitivity adjustments to strategic placement and selecting advanced technologies, you can ensure your lights function optimally in all conditions. Stay informed about the latest in
LED advancements to continuously enhance your lighting solutions, keeping your space secure and well-lit with minimal energy use. Embrace the innovation of LED motion sensor lights and enjoy the peace of mind that comes with a well-lit, secure environment.
To test an LED motion sensor light, confirm power first, then set the fixture to test mode or lower the timer. Cover or adjust the daylight sensor if testing during the day, walk through the detection zone, check aiming, and wait for the full timeout before judging the result.